Virtualization in Linux...Virtual Machines and Containers...
Implementing features of the Linux kernel that make it possible to run virtual machines and containers on the top of the operating system.

In a linux environment, virtualization is achieved using a software called a Hypervisor, like Qemu, VirtualBox or VMWare. We use these tools to simulate a different kinds of hardware purely in software.
Note: Docker, LXC and Virtual Machines work on the technologies that we are going to discuss in this blog. You may not need to use these after reading this.
Let's talk about Hypervisors
A hypervisor is a program which lets other program utilize system resources. It is sort of like an operating system, but it is so much more. Imagine there is a program which simulates a processing unit, a CPU, which runs as a program over the real CPU.
This Virtual CPU/Machine will then be given some instructions that are compatible and it can be seen that it is working exactly like a real CPU would. This is what makes a virtual machine. Obviously, there is more to a virtual machine than that, but in it's core, it is a program which simulates processing units along with a virtualized network to connect to the real internet, and so on. All the features of a real machine can be simulated like this and you can run real operating systems, like Windows or Ubuntu, on it.
You might have seen virtual machine managers like VirtualBox, VMWare or Qemu. These are all Hypervisors. And to be technically correct, these are all type-2 hypervisors. They run over any compatible Operating system, and provide resources but not direct hardware. Contrary to that, A type-1 hypervisor will make its virtual machine run on a bare metal. An example would be Kernel-based Virtual Machine(KVM) in linux.

Kernel-Based Virtual Machine - KVM
Straight from the Wikipedia, KVM is a Linux kernel virtualization module which turns the kernel into a type-1 hypervisor! Basically, it lets virtual machines run on the bare hardware instead of virtual hardware. Why is it needed? because we want the processes to run fast. With every redirection there is a cost in time which is paid by the degrading virtual machine user experience. In order to keep the VM running as fast as it can, it should be ran over the real hardware as much as possible.
Linux systems have a command kvm-ok to check if they can use KVM or not. If it is enabled, you can use KVM kernel api's to interact with virtual machine resources using ioctl function calls.
According to the Linux kernel official documentation, The kvm API is a set of ioctls that are issued to control various aspects of a virtual machine. The ioctls belong to the following classes:
- System ioctls: These query and set global attributes which affect the whole kvm subsystem. In addition a system ioctl is used to create virtual machines.
- VM ioctls: These query and set attributes that affect an entire virtual machine, for example memory layout. In addition a VM ioctl is used to create virtual cpus (vcpus) and devices. VM ioctls must be issued from the same process (address space) that was used to create the VM.
- vcpu ioctls: These query and set attributes that control the operation of a single virtual cpu. vcpu ioctls should be issued from the same thread that was used to create the vcpu, except for asynchronous vcpu ioctl that are marked as such in the documentation. Otherwise, the first ioctl after switching threads could see a performance impact.
- device ioctls: These query and set attributes that control the operation of a single device.
Device ioctls must be issued from the same process (address space) that was used to create the VM.
We are not going to write C code to interact with the KVM though, but will use Qemu's special option( --enable-kvm ) to use KVM for the virtual machines. There is a command kvm which gets installed with qemu-kvm, which is nothing but qemu with kvm under the hood.
Qemu
Qemu is an open source type-1 hypervisor for linux, openBSD and unix like systems.
Installing Qemu - Debian
Open a terminal and enter the following command for x86 processors,
sudo apt install qemu-system-x86
Once installed, move on to creating a virtual hard disk drive for our virtual machines,
qemu-img create my.img 20G
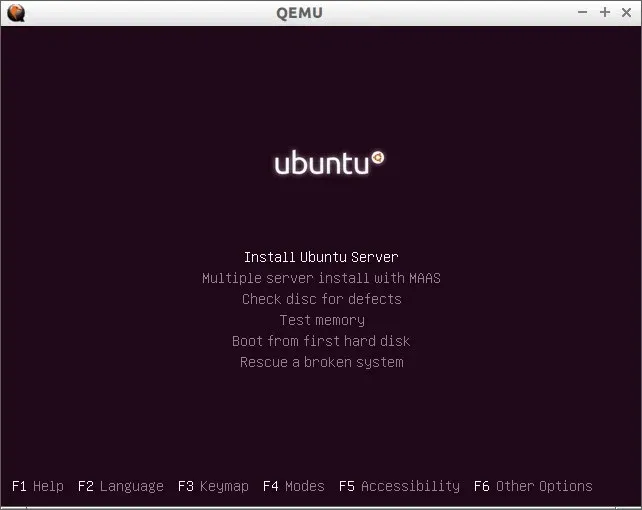
Now, we can boot a system image, just download an Ubuntu server image from here and proceed to booting the virtual machine,
qemu-system-x86_64 -hda my.img -boot d -cdrom ~/Downloads/ubuntu-server-amd64.iso -vnc 0.0.0.0:0 -k en-us -m 1000
You will be presented with a booted ubuntu live grub menu, install the system and reboot.
After installation, you can boot the machine using the following command,
qemu-system-x86_64 -hda my.img -vnc 0.0.0.0:0 -k en-us -m 1000
Simple, right? The line -vnc 0.0.0.0:0 -k en-us tells qemu to redirect the VGA output to a vnc server and the display to redirect is specified as :0 after the ip address. Keyboard layout needs to be set before you could work with VNC.
Well, what we have done till now is created a virtual machine and installed an OS in it. But there is a problem. This VM does not use KVM special features yet. For that to work we use the following,
qemu-system-x86_64 -enable-kvm -vnc 0.0.0.0:0 -k en-us -hda my.img -m 1000
Now this virtual machine is running, using as much as real hardware possible!
Para-virtualization & VirtIO
Now, because we virtualized full hardware, the operating system running on the top does not need to know if it operates on a real hardware or not. It is not efficient that we cannot use the fact that hardware is not there at all. This is where VirtIO comes to the front with the concept of Para-virtualization.
Para-virtualization means that the operating system knows that it is running over a virtual hardware and there are things regarding device drivers that can be sped up if the OS and the hypervisor cooperate. VirtIO is the name of this cooperation.
Operating system needs to have VirtIO drivers installed, which linux already ships with, and the hypervisor should support para-virtualization, qemu does. VirtIO supports many virtual devices over different buses like PCIe, over IO channel, over Memory Mapped IO.
Problems when running alot of Virtual Machines
A virtual machine is a full system, a set of firmware(BIOS/UEFI), a bootloader(GRUB/LILO), a kernel(Linux) and then the OS layer of user programs(Debian/Arch). This takes up alot of system resources if you have multiple VMs and it is not very efficient to run an instance of kernel in each virtual machines multiple times simultaneously. Booting and shutdown also takes time.
Enter Containers - Technology behind Docker and LXC
To solve the problem discussed above, we introduce containers. A container is like a virtual machine, but with a big difference. A container does not run in a virtual machine, but over the current operating system, using the host operating system kernel and file system along with network and IPC.
Linux kernel provides us with the tools to make a program run in its segregated space known as its own namespace. It is similar to the scenario when you use chroot command to gain a jailed environment. A well constructed chrooted environment is very hard to escape but it does not give you control over mount points, pid, user id, system and network resources.
Namespaces in Linux
Namespaces were added in linux kernel version 2.4.19 in 2002. Back then it was only the mount namespace, but since version 5.6 there are 8 namespaces. A program run inside a namespace, and that namespace controls what resources are provided to the program.
- Cgroup: CPU,CPU-sets, memory, network-priority, etc.
- IPC: Interprocess Communication, shared memory, unix sockets, etc.
- Mount : Mounted partitions and tables
- Net: Internet interfaces and more
- User-id: New user id-s / group id-s, mostly root inside the container
- PID: New pid tree(use new
/proc/file system by using--mount-proc) - Time: Time and timezone
- UTS: Unix Time-sharing, aka Hostname
There is a mount namespace which controls what mount points is to be seen by the process which runs inside that mount namespace. All the namespaces are specified using symlinks in /proc/$$/ns/ directory, up ls inside that directory lists files as,
lrwxrwxrwx 1 neoned71 neoned71 0 Apr  8 16:53 cgroup
lrwxrwxrwx 1 neoned71 neoned71 0 Apr  8 16:53 ipc -> 'ipc:[4026531839]'
lrwxrwxrwx 1 neoned71 neoned71 0 Apr  8 16:53 mnt -> 'mnt:[4026531840]'
lrwxrwxrwx 1 neoned71 neoned71 0 Apr  8 16:53 net -> 'net:[4026532008]'
lrwxrwxrwx 1 neoned71 neoned71 0 Apr  8 16:53 pid -> 'pid:[4026531836]'
lrwxrwxrwx 1 neoned71 neoned71 0 Apr  8 16:53 pid_for_children
lrwxrwxrwx 1 neoned71 neoned71 0 Apr  8 16:53 time -> 'time:[4026531834]'
lrwxrwxrwx 1 neoned71 neoned71 0 Apr  8 16:53 time_for_children
lrwxrwxrwx 1 neoned71 neoned71 0 Apr  8 16:53 user -> 'user:[4026531837]'
lrwxrwxrwx 1 neoned71 neoned71 0 Apr  8 16:53 uts -> 'uts:[4026531838]'
Each entry represents the namespace in which the process belongs to.
Running a bash shell in a new namespace!
To run a /bin/bash in a new PID and mount, we use unshare command which uses unshare syscall under the hood.
unshare -m --mount-proc --fork --pid /bin/bash
After running above command, we have started a shell process in a new NS. Net namespace can be unshared bu using --net option but it requires a little setup in order to be usable inside the namespace. Let's look into it in the next section.
Try running ps command after,
PID TTY          TIME CMD
  1 pts/0    00:00:00 bash
  7 pts/0    00:00:00 ps
as you can see that the PID is 1, which is normally not possible because it is always the init(systemd in latest debian images) process which gets the pid 1 but because we are in a new PID namespace we get 1.
Setting up a Network Namespace Manually
In this process we shall see how do we setup a working internet namespace for a program. We shall call our namespace NS1.
- Use
ip netns lsto show current namespaces.
2. To create a net NS, ip netns add [name_of_ns=NS1], which will create a NS1 named file in the location /var/run/netns/
3. Create a pair of Virtual Ethernet wire,
sudo ip link add dev host_end type veth peer name container_end
4. Use ip a to see all the interfaces. You will see that the newly created veth pair is added in the interfaces list.
1: lo: <LOOPBACK,UP,LOWER_UP> mtu 65536 qdisc noqueue state UNKNOWN group default qlen 1000
    link/loopback 00:00:00:00:00:00 brd 00:00:00:00:00:00
    inet 127.0.0.1/8 scope host lo
       valid_lft forever preferred_lft forever
    inet6 ::1/128 scope host
       valid_lft forever preferred_lft forever
13: wlp3s0: <BROADCAST,MULTICAST,UP,LOWER_UP> mtu 1500 qdisc fq_codel state UP group default qlen 1000
    link/ether a4:5e:60:c1:83:03 brd ff:ff:ff:ff:ff:ff
    inet 192.168.228.169/24 brd 192.168.228.255 scope global dynamic noprefixroute wlp3s0
       valid_lft 2474sec preferred_lft 2474sec
    inet6 2409:4053:2d89:df14:efd1:c43a:fc1b:5929/64 scope global temporary dynamic
       valid_lft 2889sec preferred_lft 2889sec
    inet6 2409:4053:2d89:df14:c3fe:4d89:16d8:e618/64 scope global dynamic mngtmpaddr noprefixroute
       valid_lft 2889sec preferred_lft 2889sec
    inet6 fe80::9d4e:e428:f993:63ee/64 scope link noprefixroute
       valid_lft forever preferred_lft forever
14: container_end@host_end: <BROADCAST,MULTICAST,M-DOWN> mtu 1500 qdisc noop state DOWN group default qlen 1000
    link/ether aa:88:bc:ee:d9:e2 brd ff:ff:ff:ff:ff:ff
15: host_end@container_end: <BROADCAST,MULTICAST,M-DOWN> mtu 1500 qdisc noop state DOWN group default qlen 1000
    link/ether fe:a2:70:2e:f6:7d brd ff:ff:ff:ff:ff:ff
5. Change the namespace of one end, container_end, to the newly created namespace NS1, sudo ip link set container_end netns NS1. Now the container_end interface is not visible from root namespace because it has been assigned to NS1 namespace.
Note: we can run commands inside our namespace usingip netns exec NS1 [command]. To check current interface status we can substitute command forip a.
6. Assign IP addresses to our veth pairs using following commands,
Host IP: sudo ip a add 10.0.0.3/24 dev host_end , and check by ip a to see if the ip address has been assigned.
Container ip:sudo ip netns exec NS1 ip a add 10.0.0.2/24 dev container_end and check by sudo ip netns exec p1 ip a that the ip address is assigned.
7. Turn up the interfaces using, sudo ip link set host_end up & sudo ip netns exec NS1 ip link set container_end up.
Try pinging each other using,
From Host: ping 10.0.0.2
From Container: sudo ip netns exec NS1 ping 10.0.0.3
Bring up localhost: sudo ip netns exec p1 ip link set lo upThis should show you that the ping is going through in both directions. But can we ping google.com from the container? I don't think so! For that to work we will have to add a gateway route and set up IP MASQUERADING or simply NAT in out host. Also we will have to add ip forwarding in the host, it is very important!
8. Enable ip-forwarding( become root before ): echo 1 > /proc/sys/net/ipv4/ip_forward
9. Accept packets in both the directions and add them to the forward list,
sudo iptables -A FORWARD -o [interface] -i container-end -j ACCEPT
sudo iptables -A FORWARD -i [interface] -o container-end -j ACCEPT
10. Add IP masquerading,
sudo iptables -t nat -A POSTROUTING -s 10.0.0.2/24 -o [interface_name] -j MASQUERADEThis is it! you can now ping any ip address in the world. NAT is working but there is just one more thing to be done here, setting up DNS.
11. Set DNS by editing /etc/resolve.conf file and adding namespace 8.8.8.8 in the starting. Save the file and the DNS will start working!
This network namespace NS1 is ready to be used inside a container.
To use it to create a container, do chroot and bind mount the proc, dev and usr directories, then run,
unshare -UuTpfim --map-root-user --net --mount-proc /bin/bash
Now you are running inside a fully analogous Docker or LXC container.
Thankyou for reading!! Have fun now....